Environment setup
Developing Locally
Install Python
To develop locally you will need to have Python installed. Make sure you're using Python 3.10.5 or higher to develop.
Visit https://python.org to learn more about installing Python.
Create a Virtual Environment
Keep your default environment clean by installing a virtual environment.
python -m venv .venv
Once your virtual environment is created, you can activate it and install the requirements.
source .venv/bin/activate
python -m pip install --update pip
python -m pip install requirements.txt

Using VS Code
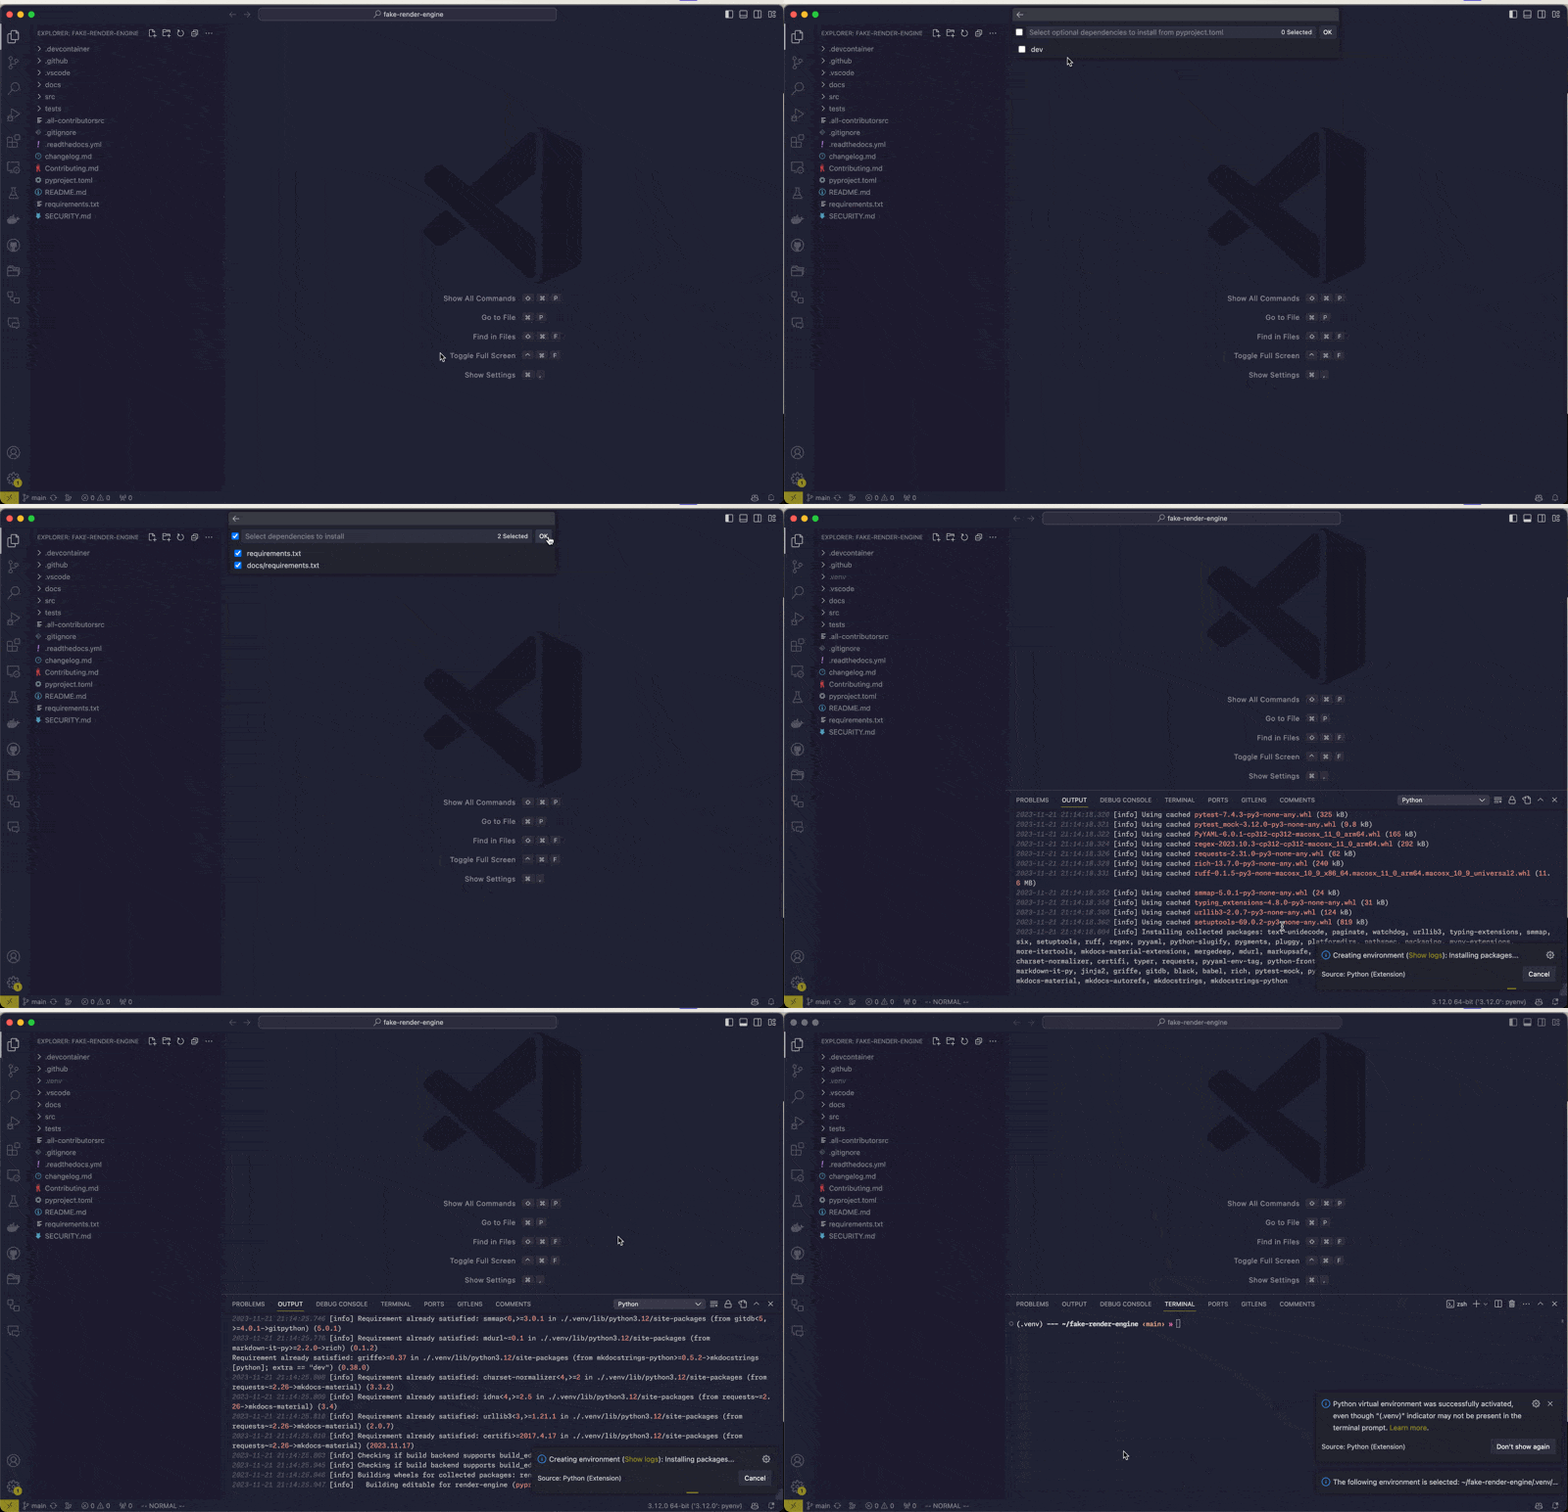
If you're using Visual Studio Code you can also create a virtual environment from the command pallet. This will also enable the installation of the dependencies.

Using Codespaces
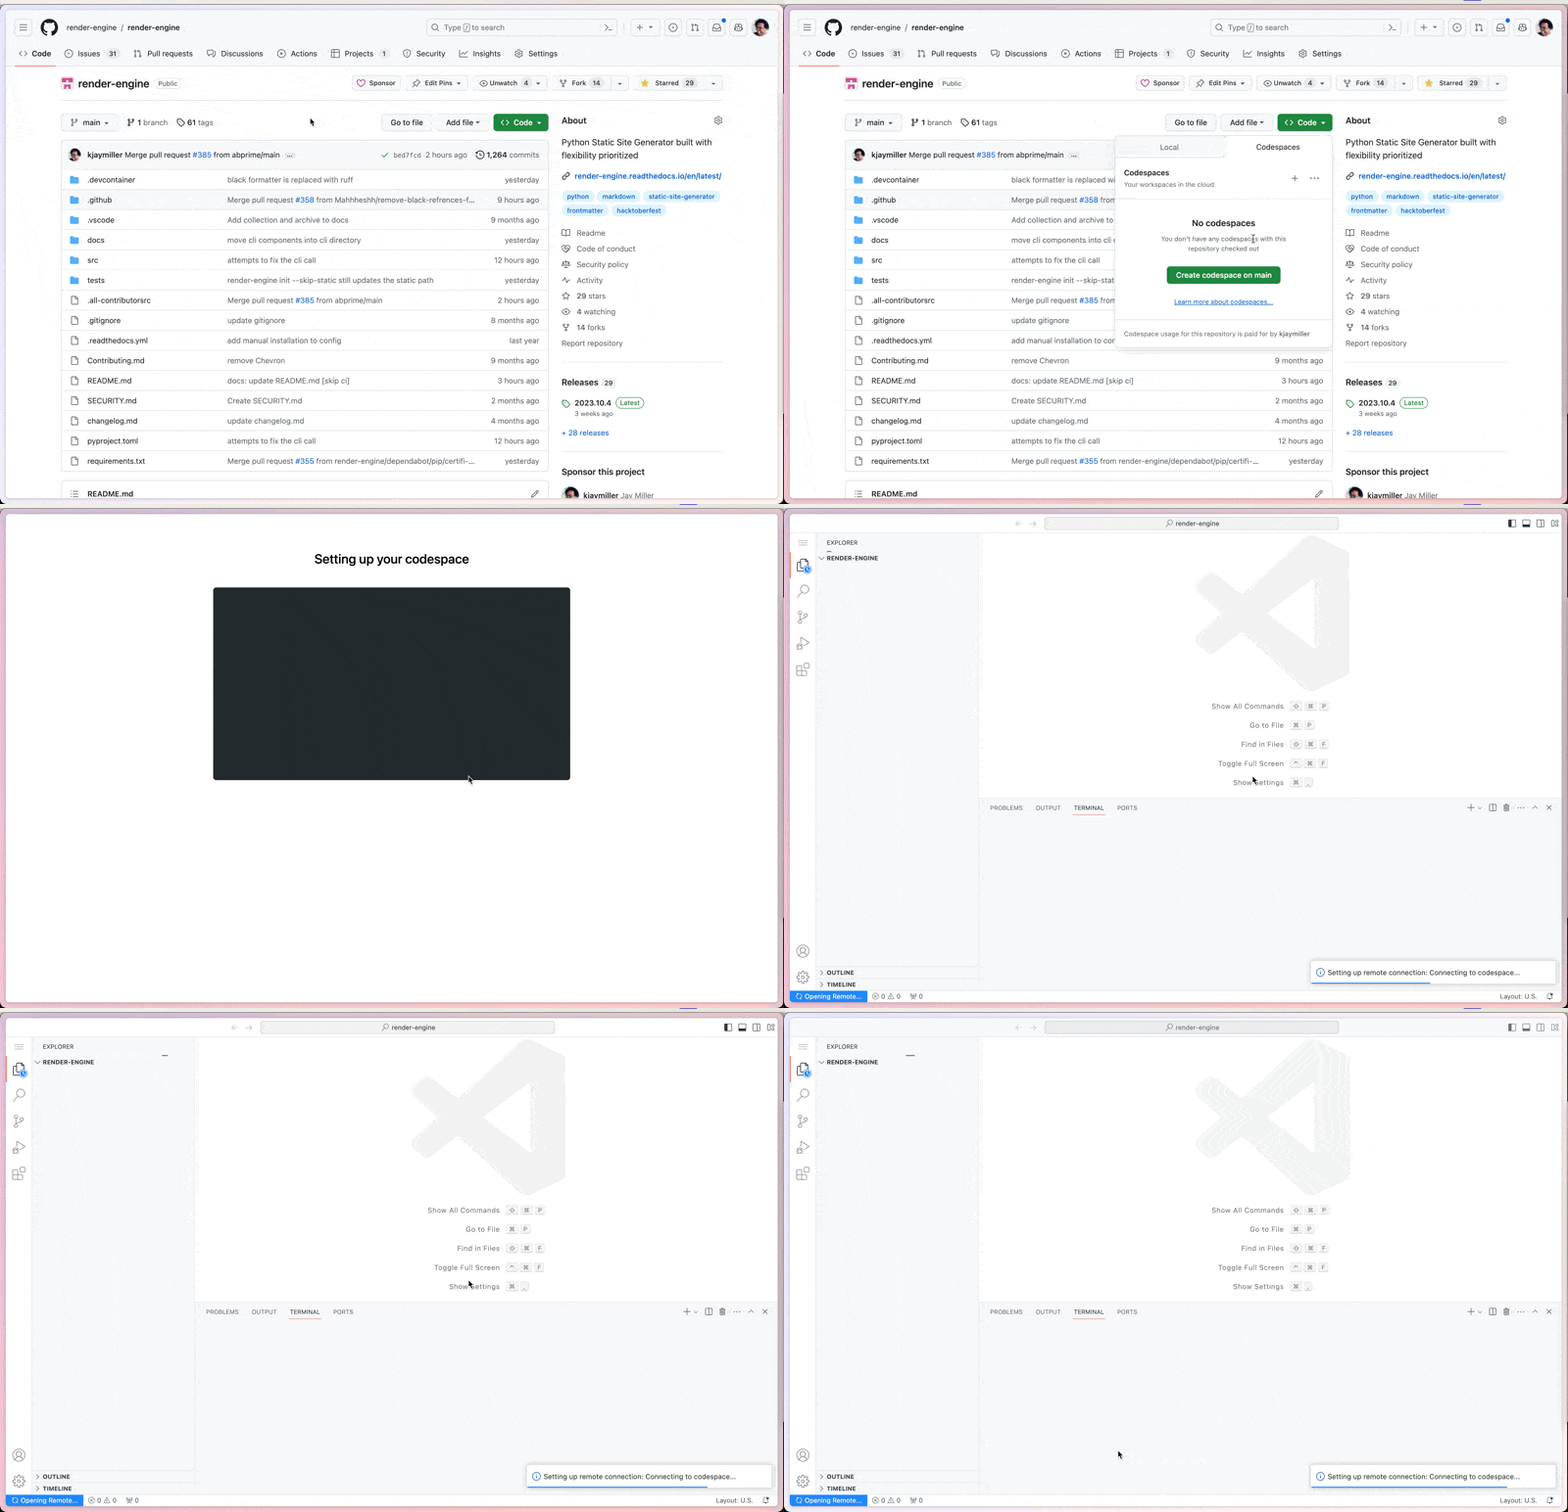
You can create a new codespace to quickly get started with your project.
You can create a codespace on main.

This will create a codespace in which you can make your changes. Don't worry they won't let you push your changes directly to the codebase but when you go to make that change it will let you create a fork and submit the PR.
There is a devcontainer.json designed to give you a good start on developing for Render Engine, including getting extensions and settings.
Using Dev Containers
If you don't want to use Codespaces you can still use the pre-configured environment in VS Code using a Dev Container.
To use dev containers, you will need to have VS Code installed, Docker, and the dev Container extension.
Start with ensuring that the docker daemon is running.
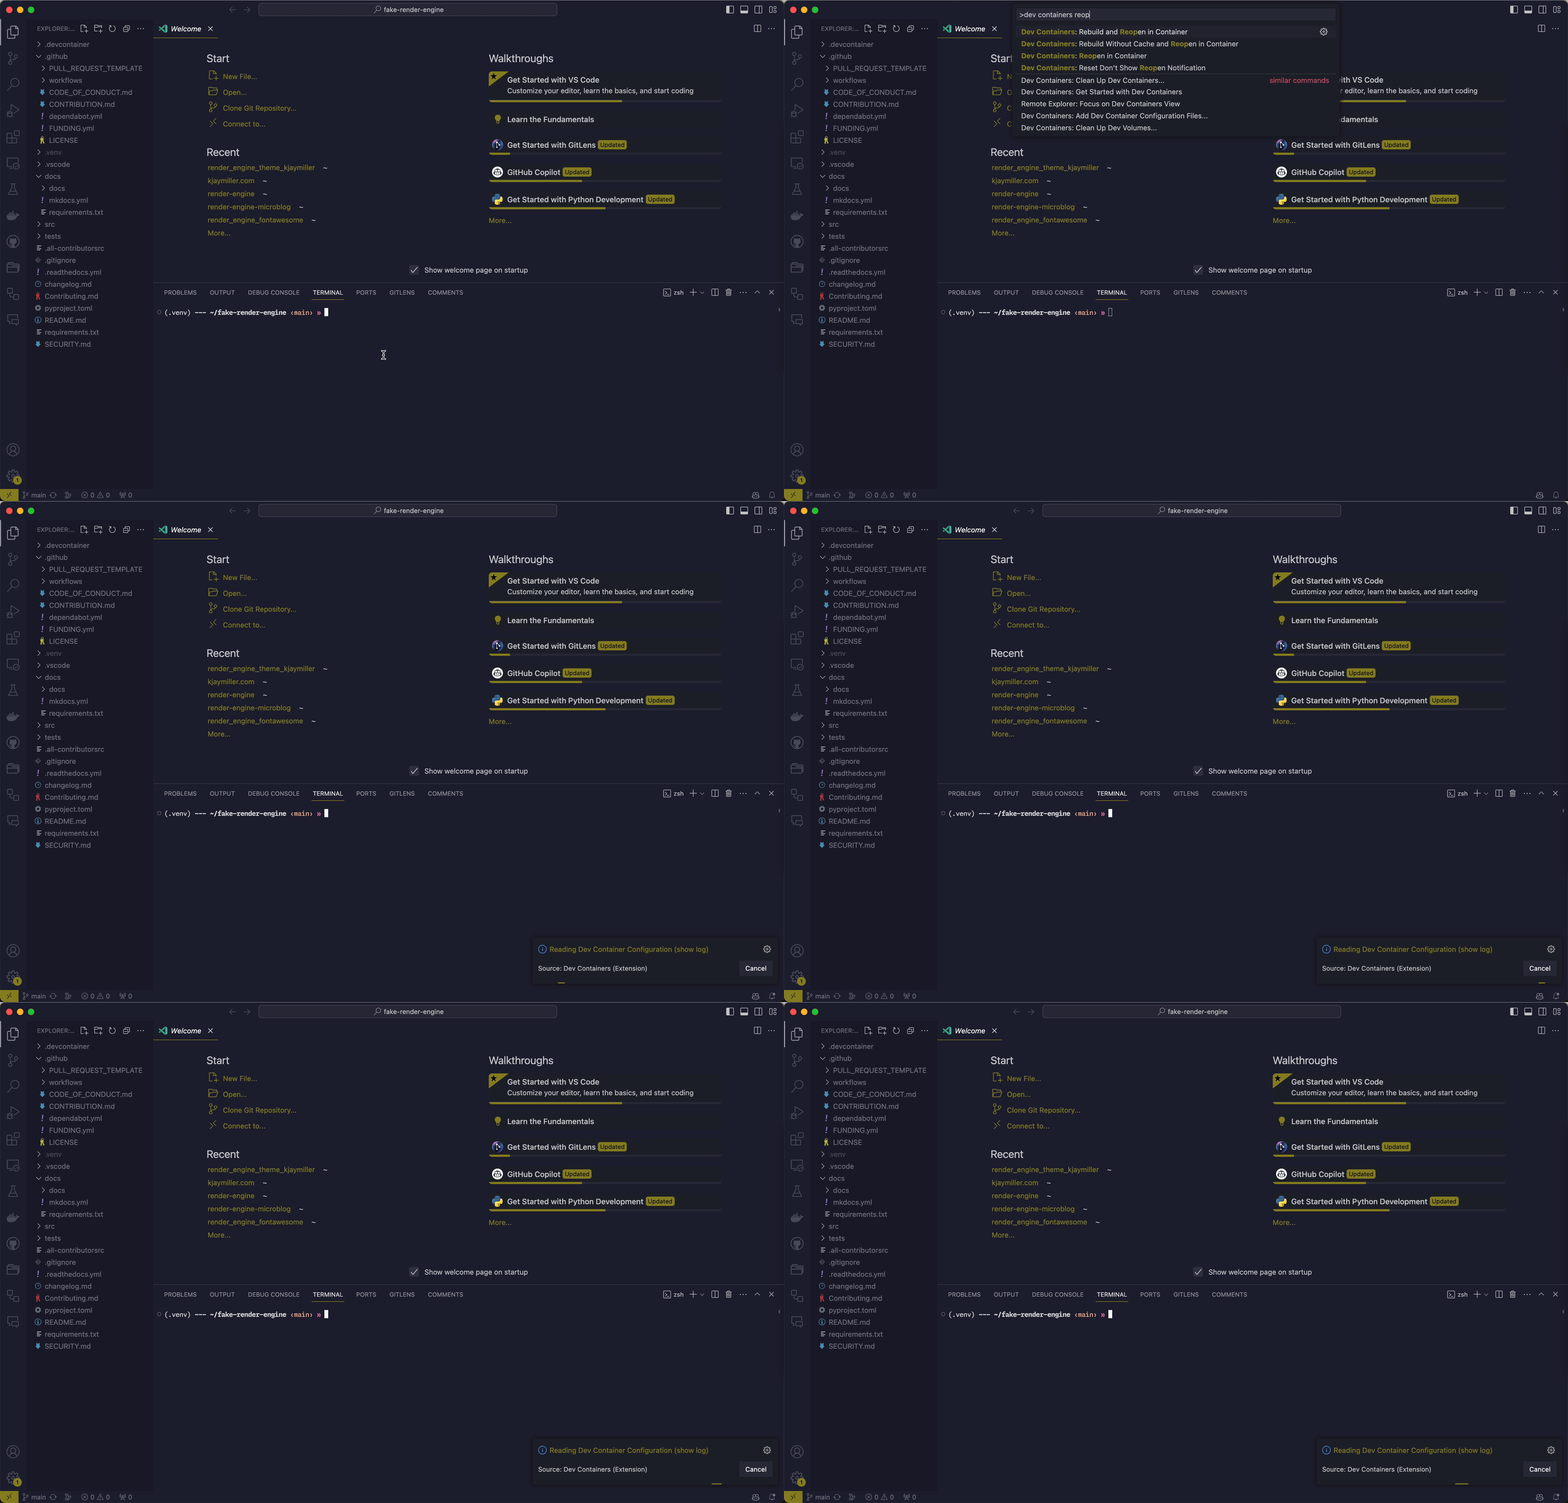
Open your fork of the project in VS Code and open the command pallet. Next, Enter "Dev Containers: Repopen in Container" and select the option.
This will create a new local environment with the same configuration as the codespace.
